How to share your iDevice screen with MAC or
windows PC
Conferencing using various internet tools over large distances is becoming very common these days and with the increase of smartphones in the total equation, sharing screen of a mobile device sometimes becomes a necessity rather than a privilege. In case of Android, VNC is present to make life easier but in case of iOS only screensplitr is known to do the task successfully but it requires your iDevice to be jailbroken. But if you do not want a solution that relies on Jailbreak for it to work, there hasn’t been a real solution around until now. Now a solution has emerged.
Lets see how to get your iDevice screen on to your Windows / Mac PC with the help of this tool.
Step 1: The application to be used for this purpose is iTools. Go to their website and download the free tool which is available for both Windows (works on Windows 8 normally even though they do not mention that in their compatibility section) and Mac.
Step 2: The file downloaded will be a zip file. Unzip it and go to through the sub-folders to reach iTools.exe. In case of Mac, double click the .dmg file and when Mac asks, copy the file to the Applications folder of your Mac and install that.
Step 3: Now open this iTools.exe to open the iTools application that lets you go through with the task of sharing of iDevice screen with your Mac / Windows PC.
Then connect your iDevice and it will change “Please insert..” in left pane to “Device connecting”.
As soon as it will connect to your iDevice, the first thing it will display is your iDevice’s details along with its serial number and if it is jailbroken or not.
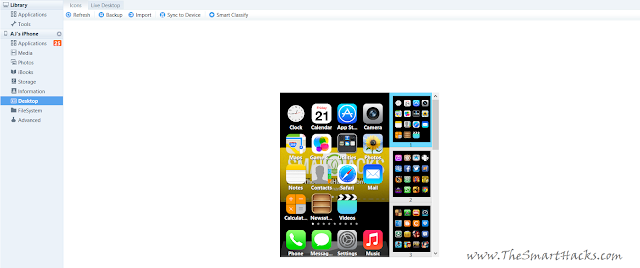
Step 4: Now in the left pane click on “Desktop” option and it will display the homescreen of your iDevice.
Now click on “Live Desktop” option present in top bar of the application besides the “Icons” option. It will take some time to start the streaming process. After the process is completed, it will start streaming your iPhone’s screen in real-time on to your Windows / Mac PC. And Et voila!


.png)

0 التعليقات:
إرسال تعليق